
React with AI: Quickly Add an LLM in a React App
So you want to write and host an API that uses a pretrained machine learning model? Maybe your client needs to be alerted when a user enters a scary comment on their website. Is the customer angry? Impatient? Happy? Within a few minutes, you can add this capability to your site. Here’s how.
There are a few prerequisites.
Step 1: Pick out a Hugging Face model
Hugging Face has tons of pretrained models. You just need to pick one that fits your needs.
- Go to Hugging Face. On the left there are over 50 categories of models. You’ll see categories like:
- Text Classification
- Text Generation
- Image Classification
- Object Detection
- Speech Recognition
- and more…
- Click on a category.
For this tutorial, we’re trying to get our React app to detect the mood of the user. That’s a text classification problem. So we’ll look under the Natural Language Processing section and choose Text Classification.
- Scroll back up to the top and click on Other. Then choose Select all under Inference Provicers.
You now see a list of models that will solve your real-world problem and can be accessed via an API.
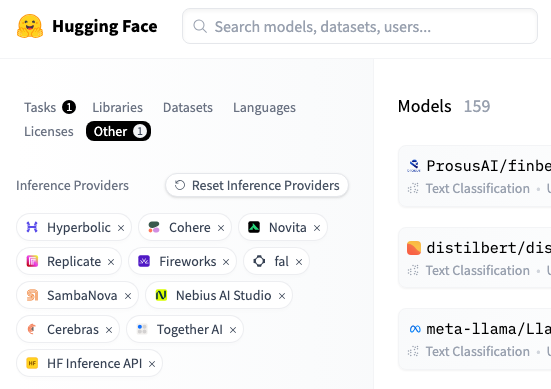
Cool, right? 🥳 Browse through and click on any model you want.
I’m going to use SamLowe/roberta-base-go_emotions for this demo.
Step 2: Learn to use the model
As you clicked on the model, you see its details which include a button that says Deploy. Click it and choose Inference Providers.
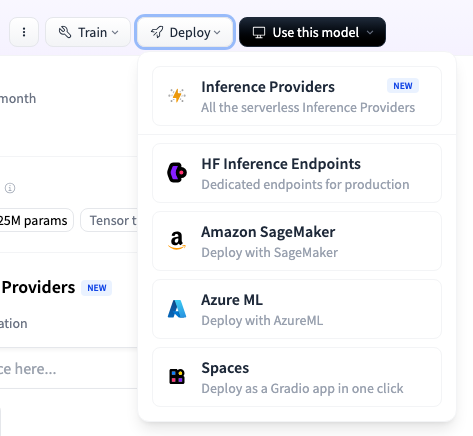
In the modal window, you’ll see how-to code snippets in a number of languages. Choose JavaScript and click that lovely Copy button.
The model I chose says to use it like this:
async function query(data) {
  const response = await fetch(
  "https://router.huggingface.co/hf-inference/models/SamLowe/roberta-base-go_emotions",
  {
    headers: {
     Authorization: "Bearer hf_xxxxxxxxxxxxxxxxxxxxxxxx",
     "Content-Type": "application/json",
    },
    method: "POST",
    body: JSON.stringify(data),
  });
  const result = await response.json();
  return result;
}

query({ inputs: "I like you. I love you" }).then((response) => {
    console.log(JSON.stringify(response));
});
Do you see that Authorization header? That’s your Hugging Face API key. You’ll use your own key.
Step 3: Make your React app consume the web API
- Edit your React website. Here’s a simple SentimentAnalysis.jsx that reads a text box.
import { useActionState } from 'react';

export const SentimentAnalysis = () => {
  const fetchMoodOnFormSubmit = async (prevState, formData) => {
    const message = formData.get('message');
    const mood = "TBD";  // <-- WILL BE FETCHED FROM HUGGING FACE SOON
    return { message, mood };
  }

  const [state, dispatchFunction, isPending] = useActionState(fetchMoodOnFormSubmit, undefined)

  return (
    <div>
      <form action={dispatchFunction}>
        <label>Your comments:<textarea name="message" required></textarea></label>
        <button type="submit" disabled={isPending}>
          {isPending ? 'Analyzing...' : 'Submit'}
        </button>
      </form>
      <h3>Mood is: {state ? state.mood : 'No response yet'}</h3>
    </div>
  );
};
Feel free to test this out. When you click the button, it will put a hardcoded “TBD” in the mood label. We want that to be the result of the Hugging Face model. Let’s do that now.
- Pretty simple; React code + Hugging Face sample code = the working app. In other words, take the two code snippets from above and combine them.
const fetchMoodOnFormSubmit = async (prevState, formData) => {
  const message = formData.get('message');
  const data = { inputs: message };
  const response = await fetch(
    "https://router.huggingface.co/hf-inference/models/SamLowe/roberta-base-go_emotions",
    {
      headers: {
        Authorization: "Bearer hf_YOUR_HUGGING_FACE_API_KEY",
        "Content-Type": "application/json",
      },
      method: "POST",
      body: JSON.stringify(data),
    });
  const result = await response.json();
  const mood = result[0][0].label; // <-- THIS IS THE MAIN MOOD
  return { message, mood };
}
Note: I had to wrap the input in a data object because the model I chose expects the input to be in a specific format. I also had to unwrap the result a bit. The model returns a list of lists of objects. The outer list is the first sentence, the inner list is the labels, and the object is the label and confidence score. So I just took the first label.
So just some massaging of the data boundaries and we have a working app. I expect this will be your experience too.
Step 4: Test it out
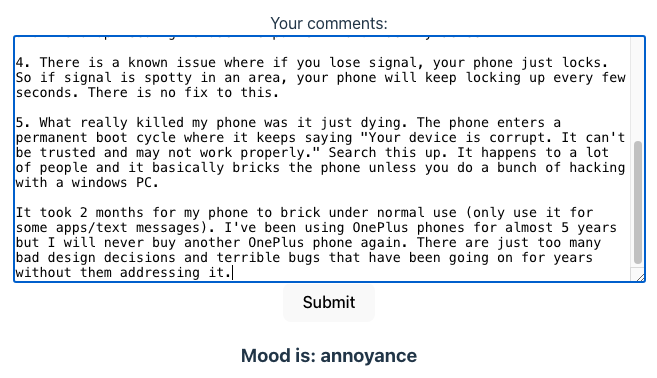
- Run your React app and enter a comment in the text box. Click the button and wait for the result. You should see the mood of the comment in the label below the button.
I grabbed a random product review from Amazon and pasted it in the text box. Obviously the buyer was not happy.
Conclusion
Congratulations! 🥳 You’ve successfully integrated a Hugging Face model into your React application.
Using these steps with different models and different React components, you can easily add AI capabilities to your web app.
Prerequisites
This tutorial assumes you have …
- An existing React web app to integrate with.
- A Hugging Face access tokey. Here’s how.